If you’re just beginning your sewing journey, you may be intimidated by the seemingly complex machinery of your sewing machine. It seems like there are tons of gears and compartments to contend with, and what on earth is a bobbin? Sometimes it seems easier to just give up and hand sew everything for the rest of your life.
If you feel overwhelmed by your sewing machine, do not fret! Like any machine, it has a lot of moving parts, but once you understand the basic mechanics, you’ll be stitching with ease. In this article, we’ll go over the history of the sewing machine, some key terms, and give you everything you need to know about how your sewing machine works.
History Of The Sewing Machine
The first non-electric sewing machines were invented in the 1830s. Sewing machines were the first widely distributed mechanized home appliance. Many tailors rioted over their invention and distribution, fearing that the sewing machine would put them out of business. However, sewing machines would prove to be a vital technological advancement, allowing for the mass production of garments, from uniforms to clothing.
Sewing machines had a huge impact on America, specifically on women in the workforce and the textile industry. Women were commonly the ones working with the sewing machines in textile mills, as they were the only ones who had the nimble fingers and the know-how to operate them. Many women felt freed by this new skill and the fact that they were seen as an important part of the industry.
Early sewing machines were either hand-cranked or operated with a foot pedal. The first electrically powered sewing machines came onto the scene in the late 19th century and were widely used by 1905. Nowadays, sewing machines can be found in many American households and are used for garment-making, quilting, and accessories. Sewing is now viewed as more of a hobby, rather than a necessity.
Key Terms
Now that we’ve learned a little bit about the history of the sewing machine, we’ll define some key parts of the sewing machine and other terms you’ll need to know.
- Bobbin: The bobbin is a little spool that is wound with thread to make up the underside of a machine stitch. Your sewing machine will either have a drop-in style bobbin or a front-load bobbin.
- Bobbin Case: The bobbin case is where the bobbin sits, and it holds the bobbin in place.
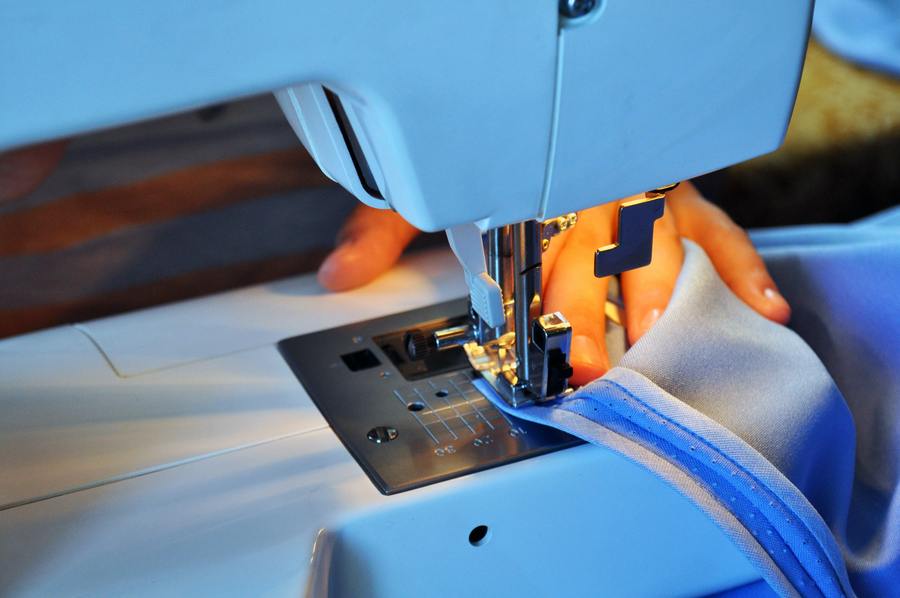
- Presser Foot: The presser foot is a removable foot that helps keep the fabric in place while you sew. Different types of presser feet are used for different projects and can be swapped out to suit your needs. Other types of presser feet include the zipper foot, the embroidery foot, and the buttonhole foot.
- Needle/Needle Clamp: Just like hand-sewing, sewing machines require a needle to pierce the fabric and make stitches. Sewing machine needles come in a huge variety of different sizes for different uses and can be swapped out based on your fabric’s texture and thickness. The needle clamp holds the needle in place.
- Throat Plate/Needle Plate: The throat plate, or needle plate, is a metal plate that sits below the needle and the presser foot. The plate has a small opening that allows the bobbin thread to come out and the needle to pass through and make stitches. You may notice that your throat plate has small notches or lines. These serve as a guide for seam allowances and help you sew straight lines.
- Feed Dogs: Feed dogs are small metal or rubber “teeth.” They pull the fabric between the presser foot and the throat plate, so you can stitch in a straight line. The feed dogs also regulate the stitch length by controlling how much fabric passes through at once. When using your sewing machine, guide the fabric with your hands, but allow the feed dogs to pull the fabric through.
- Tension Regulator: The tension regulator is a dial that controls the tension on the top thread. Setting the correct tension allows the top thread and the bobbin thread to join together in uniform stitches. Your machine will either have a manual dial that you turn to increase and decrease tension or a computerized tension that’s adjusted digitally.
- Take-Up Lever: The top thread passes through the take-up lever, which moves up and down with the needle. Before you place the fabric under the presser foot, raise the lever completely to avoid engaging the fabric with the needle.
- Bobbin Winder: The empty bobbin is placed on this winder to be filled with thread from the spool. To ensure the thread winds evenly, begin with an empty bobbin.
- Spool Pin: The spool pin is a small dowel that holds the spool of thread. Some machines come with multiple spool pins for various types of thread.
- Flywheel: Also known as a handwheel, the flywheel is a knob that raises and lowers the take-up lever.
- Stitch Selector: This allows you to select the type of stitch you want. On older machines, it will be a manual knob. On newer ones, it’ll be a digital selection. There are also stitch-length selectors and stitch-width selectors.
- Reverse-Stitch Button: Also known as a back-stitch button, this button allows you to reverse the direction of the stitches. This comes in handy when you’re securing a thread at the beginning and the end of the seam.
- Foot Controller: This is a foot pedal that starts and stops the machine. This allows you to partially control the speed of the stitches based on how firmly or softly you step on the pedal.
- Motor/Motor Housing: Electric sewing machines are powered by small motors. The motor is located in a small motor housing chamber, which opens to allow for the motor to be serviced.
How Does A Sewing Machine Work?
Now that you’re familiar with the basic vocabulary and parts of the sewing machine, we’ll explain how it works. There are three main mechanisms that will help you understand how the sewing machine functions.
Main Mechanisms of a Sewing Machine
The simplest mechanism in a sewing machine is the needle mechanism. This is controlled by the take-up lever and is responsible for raising and lowering the needle. The needle mechanism is basically two wheels connected to a crankshaft, which attaches to the needle clamp and the needle. The crank converts the motor’s rotary, or round-and-round, motion into the needle’s reciprocal, or up-and-down, motion.
The next mechanism involved in the sewing machine is the bobbin and shuttle mechanism. The stitches rely on a shuttle and a hook to function. The shuttle and the hook have to rotate a bit faster than the needle. The shuttle turns quickly using gears.
The final mechanism to understand is the feed dog mechanism. As we said before, the feed dogs are small teeth that pull the fabric through between the presser foot and the throat plate. The feed dogs ensure that the fabric is pulled through at a steady rate, so all the stitches are even. The feed dogs work by pulling the fabric upwards and forwards at the same time, which happens through two interlinked mechanisms driven off the main shaft.
The feed dog mechanism involves an egg-shaped wheel that makes a lever rock back and forth, which in turn pulls the feed dog from right to left. At the same time, a second crank mechanism moves the feed dog up and down. These two mechanisms work in tandem to pull the fabric through.
How Does A Sewing Machine Stitch?
The three internal mechanisms all work together so the machine can make perfect, evenly-spaced stitches. But how does the machine actually make stitches? Well, it’s fairly similar to the way you’d make stitches when hand-sewing. The biggest difference is that sewing machines use two different threads to make stitches; the top thread and the bottom thread.
The top thread feeds from the spool and pokes through the eye of the needle. The bottom thread feeds from the bobbin. The needle begins high and moves down to pierce the fabric. The needle feeds the top thread through the material to form the next stitch. The top thread must have the correct tension to stop too much thread from pulling off at once.
Next, the needle punctures the material, taking the top thread with it. The bottom thread is held in a bobbin case, also known as a shuttle, which rotates, and has a hook on the end. As the bobbin case rotates, the hook will pass through the loop made by the top thread.
The needle now rises, and the shuttle hook drags the top thread loop around so that it locks around the bobbin thread. As the needle pulls upward, it tightens the top thread and pulls it back off the shuttle hook. The needle pulls the stitch tight, and the process completes over and over to create a line of stitches.
Conclusion
Although sewing machines have a lot of moving parts, they’re mostly just simple machinery. Once you understand the basic parts and how they work, it’s much easier to work your sewing machine. With a little understanding and practice, you’ll be able to operate your machine and stitch with ease.
To learn more about sewing, and join our community, visit the Love Sew website. We sell high-quality sewing tools and gadgets and publish helpful blog articles and tutorials. Come visit us, and learn how to be the best seamstress you can be.
Sources:
The Sewing Machine & Its Impact on America | History of Technology
Other Historic Moments in the History of the Sewing Machine | ThoughtCo

